
1CHANNEL – RELAY INTERFACE
💡 RELAY Interface with Arduino – Short Note
Overview:
A 1-channel relay module allows an Arduino to control high-voltage devices like lights, fans, or appliances. It acts as an electrically operated switch that can be turned ON or OFF through a digital pin of the Arduino.
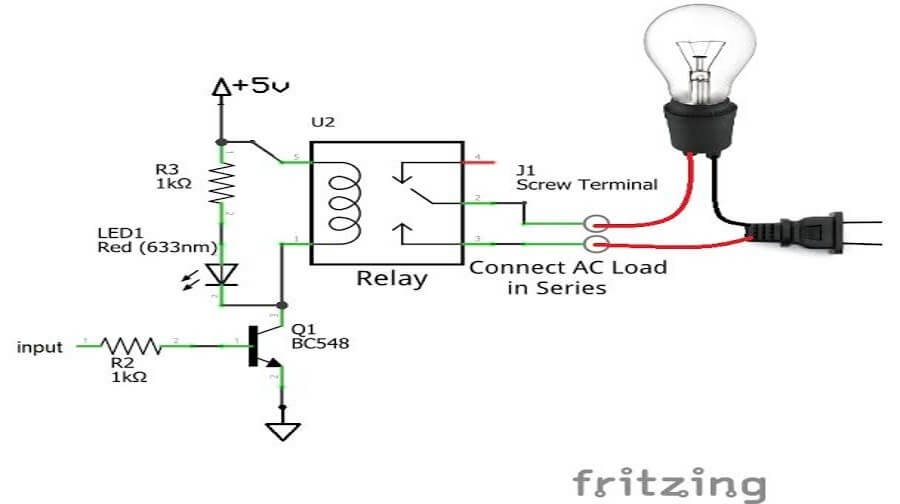
🧠 Working Principle:
The Arduino sends a HIGH or LOW signal to the relay’s IN pin.
This energizes/de-energizes an internal electromagnet in the relay.
The relay toggles between open (OFF) and closed (ON) positions, controlling an external device.
🔌 Circuit Diagram:
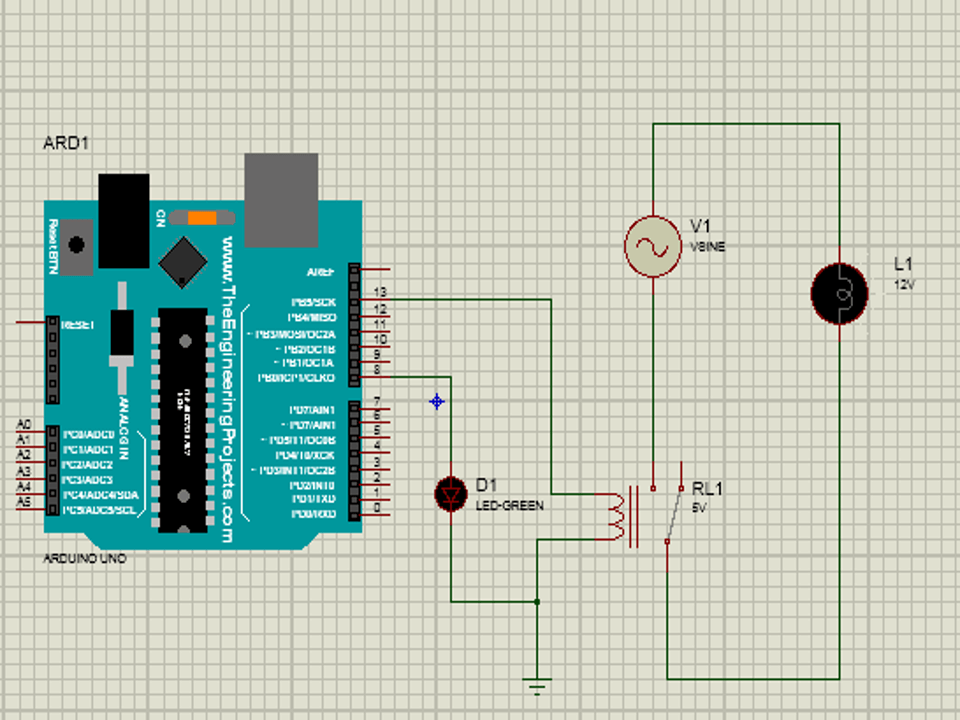
| Relay Pin | Connect To |
|---|---|
| VCC | Arduino 5V |
| GND | Arduino GND |
| IN | Arduino digital pin (e.g., D7) |
| COM (Common) | AC Device Line wire |
| NO (Normally Open) | AC Load |
📝 Sample Arduino Code:
✅ Applications:
Home automation
Smart irrigation
Fan/light control systems
Industrial control panels
📞 For More Details & Project Support:
Power Integrated Solutions
Networks | Electronics | Home Automation | Water Automation | IoT | PLC | Embedded | DBMS
📍 Location:
10A/3, Radhakrishnan Colony,
Sasthri Road, Tennur,
Tiruchirappalli, Tamil Nadu – 620017
📧 Email:
📱 Phone / WhatsApp:
+91 76393 85448
+91 82488 85959
🌐 Let’s Build the Future with Innovation in Education & Technology!